Other Education Wars articles can be found here.
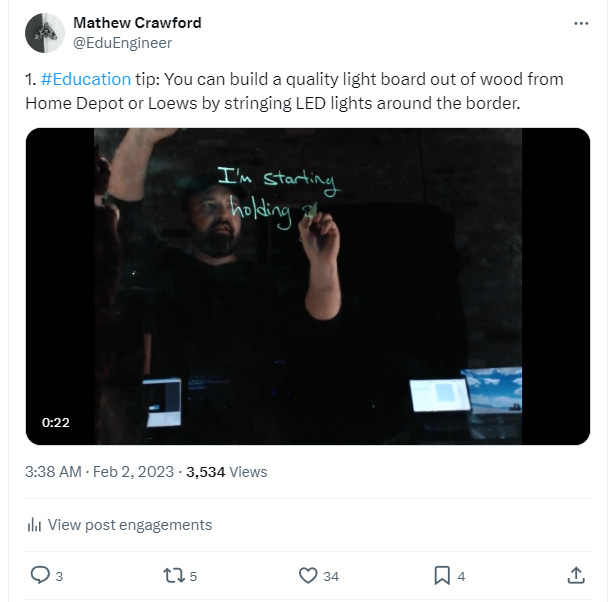
Last year I made a Twitter thread on how to build a light board. I'm not sure why I never published it at RTE, so I'm fixing that now.
Forgive the low quality of the videos I post. This is what it looks like to test home tech as you go. During normal times, my wife and I often experiments with our own DIY educational tech. It is left to the reader to connect this tech to what you have likely seen in online courses and educational videos. This is technology that most anyone can make useful for the right projects.
We will likely see a day in the not-too-distance future when we can project diagrams, maps, and other useful images onto/into such boards, and I think that it's best to continue to disseminate the steps in this technology in a way that allows for effective low budget projects. This keeps centralized and propagandistic entities from dominating education as they often do.
What is a light board?
You've probably seen a few educational videos where people were standing behind one, writing on them with some sort of marker-thing, and the writing pops pretty well. It looks like writing on a window whose span is larger than the screen, making the writing appear almost to exist on an invisible wall.
How you manage your animals during the construction process is up to you.
The lighting and sound is not nearly optimal in our videos, which is an easy fix once the board is ready. As I mentioned, we just wanted to see the board work as we built it.
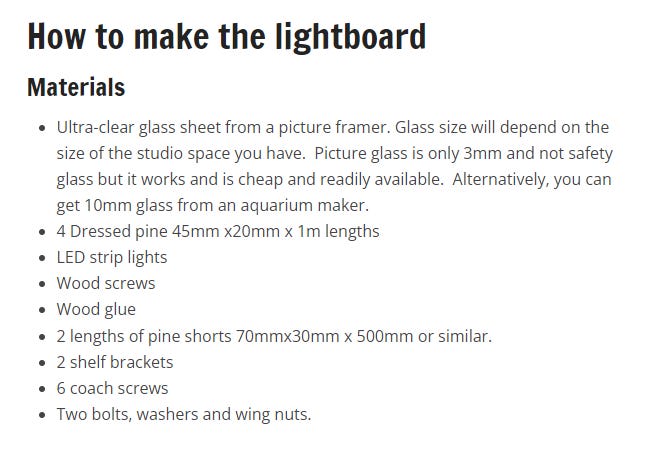
There are professionally built light boards that cost thousands of dollars. I have seen $10k and $20k versions at universities. I'm going to explain how to make one of dimensions 4' x 6' for around $200 (in 2018 money, so you can adjust) if you're willing to do a bit of your own handy work. Some people have built their own light boards for $100:
If you're a creative builder, obviously you can change the recipe to suit your own design. Here is another guide that we used when considering how to construct our own.
At some point we realized that we needed to put up a black curtain or other background. While we had a very nice real brick wall background, which was otherwise good for meetings and video, a light board works best without any visual interference at all.
Aside from the wood or framing material, you need a string of LED lights or equivalent. The key to the light board is that you have the LED light shining into the board from an edge.
You can choose between glass or plexiglass. Just buy the size you want. I prefer the hardest surface available.
The markers are called chalk markers. They're an ongoing cost similar to using white board markers. They're water based, so easy to clean with a microfiber cloth. Just make certain that you never grab and use a permanent marker or that difficult cleaning task is on you.
We experimented with low light before deciding that a solid dark background was best. This might be useful for some purposes, but as you can see, the presenter becomes ghostly:
Kitten not included.


I don't understand why the text on the lightboard isn't inverted which is what's I'd expect when you're positioned behind it. Is the camera filming a mirror of this scene?
Neat! Of course, I saw “light board” and the theatre nerd in me thought something entirely different which I have built myself a few times when doing shoestring budget productions. But this looks awesome and I want to try making one! For a show, as a matter of fact. Thanks for the tip!